|
|
|
|
|||||||
Tx21v2 User Information
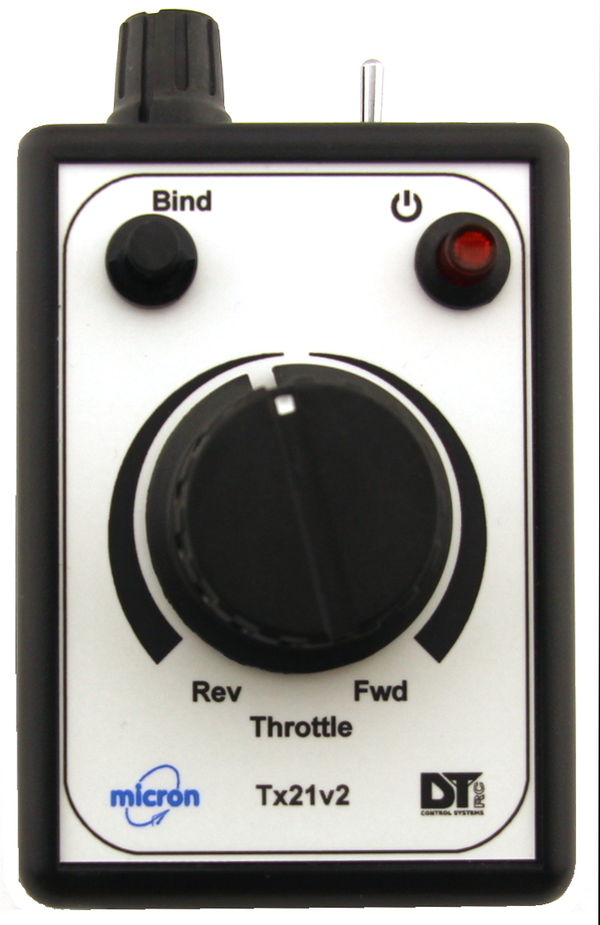
Tx21v2 is a hand-held wireless transmitter intended to control one model railway locomotive engine. It has main controls for throttle and inertia plus a push button and a 3-way toggle switch for control of auxiliary circuits such as lighting, sound card triggers and couplers.
Tx21v2 can be used for Deltang Rx6x receiver programming using the toggle switch to step through programming levels. Programming details for each receiver may be accessed from the web page for the receiver.
Tx21v2 is available in 2 versions for use with an appropriately configured receiver:
Technology
| throttle: | channel 1 |
| toggle switch: | channel 3 |
| bind button: | channel 5 |
Battery
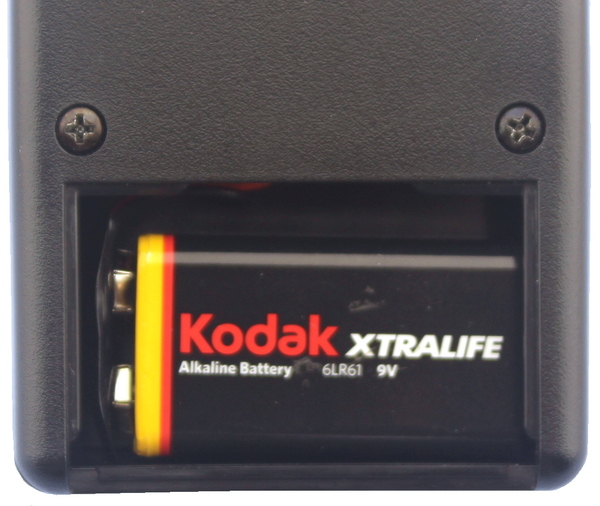
Tx21v2 uses a PP3 9V battery, preferably Alkaline or NiMH / Lithium rechargeable. The maximum working voltage of the internal electronics module is 10V and there is a protection diode wired in series with the battery lead. This allows the battery voltage to be up to 10.7V. If the battery voltage is above this value, the internal regulator will shut down and the transmitter will not operate.
To replace the battery:On / Off Push Button
Tx21v2 has an illuminated push-button latching on/off switch. The LED lights continuously when the transmitter is on and flashes when Tx21v2 is in bind mode (see below). It is best to switch the transmitter on before the receiver. If a receiver is switched on with Tx21v2 off, it is likely to enter bind mode with rapid flashing of the LED on the receiver board. If you did not intend to bind, switch the receiver off, then switch Tx21v2 on followed by the receiver.
Speed / Throttle Knob
Tx21v2 is available with a centre-off or low-off throttle control. The throttle type is actually implemented in the receiver, transmitter differences are the front-panel label and whether there is a centre-click on the throttle.
Toggle Switch
The 3-way toggle switch is used to select forward/reverse with receivers that have 'low off', full-range motor control. it can be used to control lights instead of direction with receivers that have 'centre off' motor control.
Bind Button
Note: holding the bind button for longer than 20 seconds will result in strange things happening (see Calibration).
If a receiver has not previously been bound, it has to be 'paired' with the transmitter. Binding is only required once per receiver.
The bind button also operates R/C channel 5 and this can be used to action auxiliary functions on the receiver - e.g. operate a servo to sound a steam whistle or trigger a sound card.
Inertia / Momentum Knob
Inertia 'dampens' or slows down changes to to the throttle control; this affects both acceleration and deceleration. The Speed knob sets a 'target' and inertia changes the transmitted throttle value slowly until it reaches that target. The LED flickers while a change is in progress.
To stop quickly both throttle and inertia controls must be in the 'off' position. Inertia is off when turned fully to the left.
Receiver Programming
Tx21v2 can be used to program Deltang Rx6x receivers using the 'SOS' method. Rx4x receivers do not support this method and cannot be programmed using Tx21v2. You need to refer to the receiver's programming instructions for details of the available functions and the programming sequence to modify the functions.
One programming change requires up to five choices to be made. These are called 'levels' and each has several options. They are documented in the programming table which is on the Deltang web site (go there or follow the link from the Micron R/C web page for a particular receiver). Completion of a programming change exits programming mode and requires the SOS sequence to be entered again for the next change.
You have to remember which level you are changing and the repeating LED flashes display the current option for that level. It is a good idea to write the programming sequence on a piece of scrap paper and cross off each digit as it is entered. You always start at level 1. For example, the first choice is the Menu number (programming group). The first option (1-flash) is for changing 'H' outputs, the second (2-flash) is Menu 2 to change P outputs for servos, 3-flash is for Menu 3 to change P outputs for on/off switching, etc. Refer to the Programming Table for your receiver to find the number of options and what they change. Each level is in a separate column, 1 to 5 left to right.
For example, to configure output P4 to switch on (3.3V) when channel 3 is high (toggle up), the programming sequence is 3,4,1,3,3, where:
The general procedure for entering a programming sequence is, for each level:
When you make a choice with the toggle switch (up or down), the Rx LED will briefly flash rapidly and then:
Calibration
All ready-to-use transmitters are calibrated as the final manufacturing step. This sets the throttle control centre position and normally only needs to be done once. If you suspect that the throttle control is not operating correctly or you have replaced any of the internal components (e.g. throttle potentiometer), your transmitter may need calibration.
If the bind button has been inadvertently held down for longer than 20 seconds, the previously stored calibration data will have been overwritten and you could find that the throttle control behaves strangely.
To perform calibration:
